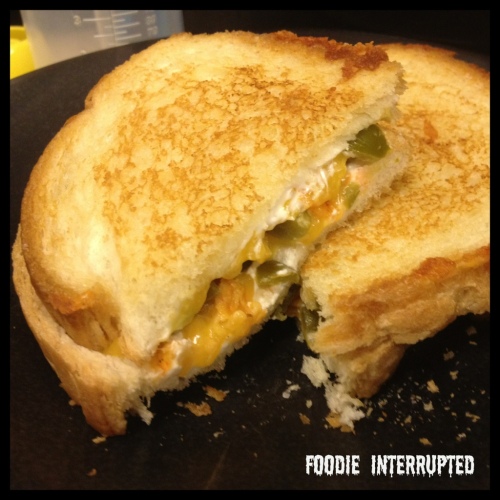
Jalapeño Popper Grilled Cheese Sandwich

20120917-112147.jpg

It’s been quite the whirlwind around here at Foodie Central! School, sports, Scouts and pure craziness hasn’t left a lot of time for cooking, much less blogging!

This sandwich is for Mr. Foodie. He’s a jalapeño popper junkie and I thought this would be right up his alley. This was a yummy sandwich and we both enjoyed it. I made this both with fresh diced jalapeños and with the canned roasted diced jalapeños. Our personal take was that the canned was much better and gave a more authentic popper taste. The fresh diced did not work well for us. I do believe if you took the time to roast your own fresh ones, that would be the best bet though, so if you have the time, definitely go that route!

The ingredient list is general, do as you see fit for with the amounts per your personal taste!

JALAPEÑO POPPER GRILLED CHEESE SANDWICH

Ingredients:

-Sliced French Bread
-Butter
-Cream Cheese
-Shredded Sharp Cheddar Cheese
-Canned Roasted Dice Jalapeños

Directions:

1. Butter one side of each slice of bread, and spread cream cheese on the other side.

2. Place butter side down on a non-stick pan over medium heat.

3. Spread a bit of the jalapeños on one slice of bread and top with shredded cheddar cheese.

4. Continue to cook until cheddar cheese melts and then top it with the other slice, cream cheese side down.

5. Once the outside of the bread is crisp and browned to your liking, you are ready to eat!

Spicy Honey Chicken

20120902-074126.jpg

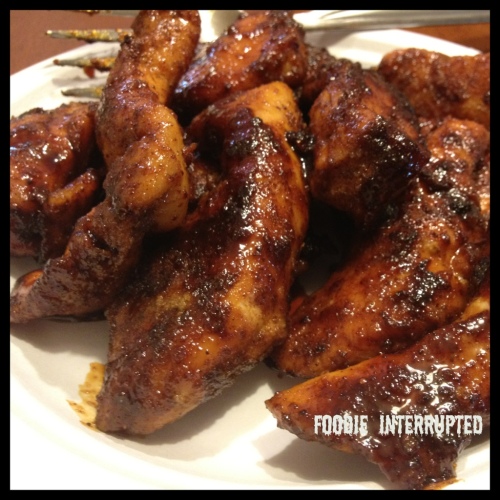
Way back when I first started surfing the Internet to find recipes, I came across this one on a great blog called Our Best Bites. I have made this recipe many times and have always enjoyed it, so has the Mr. Foodie and our Foodie children.

I will say that as-is, the recipe is great. However, I’ve also found it very forgiving. The original is made with boneless, skinless chicken thighs and while I prefer it that way, my guys like breast meat so I made it with cut up breast tenders and it was still yummy. I’ve made it leaving out coriander and chipotle chili powder when I didn’t have it on hand and yep, still yummy. I will say that I don’t think it is overly spicy, in the burn your mouth sense, after all, my kids eat it with zero problems – the honey glaze seems to really cut that down. I have even used Hot Mexican Chili powder in it and it never got off-the-hook spicy.

Although it makes quite a mess in your pan, it is worth it! Such a tasty, easy recipe, definitely worth adding to the rotation.

SPICY HONEY CHICKEN
Adapted from Our Best Bites

Ingredients:

-4 Large Chicken Breasts (boneless, skinless, cut into smaller pieces)
-2 Tsp Vegetable Oil
-2 Tsp Garlic Powder
-2 Tsp Chili Powder
-1/2 Tsp Onion Powder
-1/2 Tsp Coriander
-1 Tsp Kosher Salt
-1 Tsp Cumin
-1/2 Tsp Hot Mexican Chili Powder
-1/2 Cup Honey
-1 TBS Cider Vinegar

Directions:

1. Make a rub for the chicken pieces by combining the garlic powder, both chili powders, onion powder, coriander, salt and cumin.

2. Drizzle chicken pieces with oil and coat well with rub mixture.*

3. Heat a grill pan, coated with cooking spray, on the stove to medium/medium-high heat.

4. Grill chicken pieces until cooked through, depending on the size of the pieces, about 3-5 minutes on each side.

5. While the chicken is cooking, place honey in microwave and heat until it thins out a bit – 30 seconds to 1 minute. Stir in the vinegar. Reserve a little to drizzle on at the end for serving.

6. Brush the honey mixture on both side of chicken pieces at end of grilling. I continue to brush until it is all used up and turn pieces frequently.

7. Top with reserved glaze before serving.

*You can mix chicken, oil and rub mixture in a large plastic bag or glass dish and leave in fridge if you want to do this part ahead of time. Just mix well to coat chicken pieces.

Spaghetti with Garlic, Oil and Pepper

20120824-101725.jpg

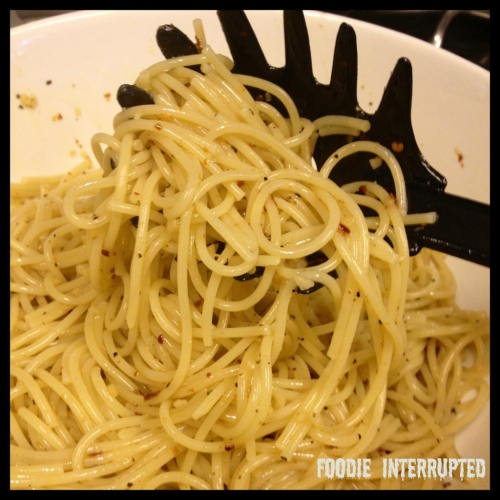
I thought I would stick with a pasta theme and post this very simple, almost non-recipe, for Spaghetti Aglio, Olio e Peperoncino (spaghetti with garlic, olive oil and pepper flakes.) This dish actually makes me think of a dear friend of mine, as it is her favorite. She is someone I consider an ‘eating buddy’ and our general rule is never to order something on the menu that is either a) so simple we can whip it up ourselves anytime or b) made from ingredients that are common and can be purchased just about anywhere. However, if this dish is on the menu, she is ordering it – going against both of our eating out rules. Tsk, Tsk, Tsk…. But, I can’t blame her, I guess, I really like it too!

This dish is pretty spicy so I would definitely adjust to your personal taste and comfort level. I had honestly never thought of the exact amounts for this recipe as I have primarily always done it by sight and/or taste. I highly suggest playing with it to your liking as well.

Mr. Foodie and I ate it as our main course, with a side of steamed broccoli but it would go well with lots of other veggies and fish, shellfish or poultry.

SPAGHETTI WITH GARLIC, OLIVE OIL AND PEPPER FLAKES

Ingredients:

~10 Oz. Spaghetti
-3 Garlic Cloves, finely minced
-1 (to 1 1/2) Tsp Crushed Red Pepper Flakes
-1/3 Cup Extra Virgin Olive
-3/4 Tsp Salt
-1/2 Tsp Coarsely Ground Black Pepper

Directions:

1. Boil Spaghetti noodles in salted water until al dente. They should have a little bite and not be overlooked at all.

2. Drain spaghetti well and place in serving bowl.

3. Add all other ingredients to Spaghetti and toss until well coated.

Note: This can be served warm or at room temperature. If you choose to serve at room temp, be sure to re-toss before serving.

Hawaiian Style Macaroni Salad

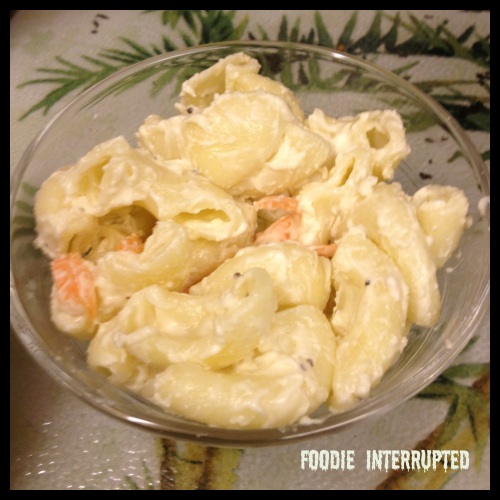
If you’ve ever been to Hawaii (or a Hawaiian BBQ restaurant on the Mainland) you know that virtually everything is served with a side, or scoop of ‘mac salad’.  The Hawaiian plate lunch consists of the main entree, generally two scoops of rice and macaroni salad.  It might seem like a strange combo to some, but it’s just the way it is.  Everyone has their version of this picnic food and the folks in Hawaii are no different.  This might seem too soft (overcooked) and too mayonaisy (made that word up) to some but that is generally how it is served.  I have to say that I like macaroni salad in most forms, but Hawaiian style is my favorite.  This recipe was adapted to one I found a while back from Cook’s Country Magazine.  While writing this post, I am also imagining myself eating it in Hawaii so it is a little mental getaway for me!  Be warned this recipe makes a lot (serves 8-10) so it’s good for a potluck.  Didn’t want you to have it coming out of your ears!

HAWAIIAN STYLE MACARONI SALAD

Ingredients:

-2 Cups Whole Milk

-2 Cups Mayonaise

-1 TBS Brown Sugar

-1/2 Tsp  Plus 1 TBS Salt

-2 Tsp Black Pepper

-1 Lb. Large Elbow Macaroni

-1/4 Cup Cider Vinegar*

-1/3 Cup Shredded Carrot

*Original recipe called for 1/2 Cup Cider Vinegar but I feel that is too much.  Some don’t add it at all, so it is really up to you and your personal taste.

Directions:

1.  Make a dressing by whisking together, in a small bowl: 1 1/2 Cup Milk, 1 Cup Mayonaise, Brown Sugar, Salt and Pepper.

2.  Boil Macaroni, adding 1 TBS Salt to the water, and cook for 15 minutes.  The pasta will be very soft, this is okay.  Drain it and return to the pot.

3.  Add vinegar to the Macaroni and toss – let cool for about 10 minutes.

4.  Stir in prepared dressing and cool completely.

5.  Add the Carrot, remaining Milk and Mayonaise to the cooled Macaroni and mix well.  Season with Salt and Pepper to taste.

6.  Refrigerate for at least one hour before serving, can be chilled up to two days.

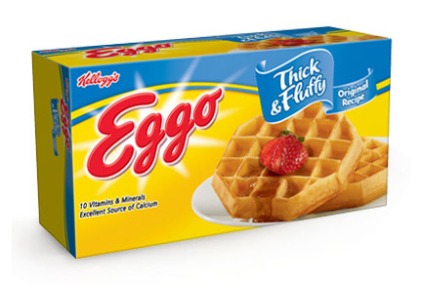
Food Confessional: Eggo Thick and Fluffy Waffles

Image

Click Picture to Link to Official Site.


So, this is not my typical recipe post.  This is purely confessional.  Sometimes, bad food happens to good people. And these waffles, my friends, are what happened to me.  I’m not sure how I happened upon these, probably wandering around Target out of boredom one day.  I love a good waffle.  Preferably a buttermilk waffle.  Or a yeast waffle.  And definitely HOMEMADE, not from a toaster!  Insert these Eggo Thick and Fluffy Waffles.  I can’t explain why I love these so much.  They are the perfect balance of crunchy and soft.  Just reading the nutritional information alone should turn me off.  160 calories per waffle.  Just one?  I can’t eat just one.  Don’t judge me.  Okay, go ahead, judge me.  I’ll be in the corner with my box of waffles.


Aside

20120813-110015.jpg

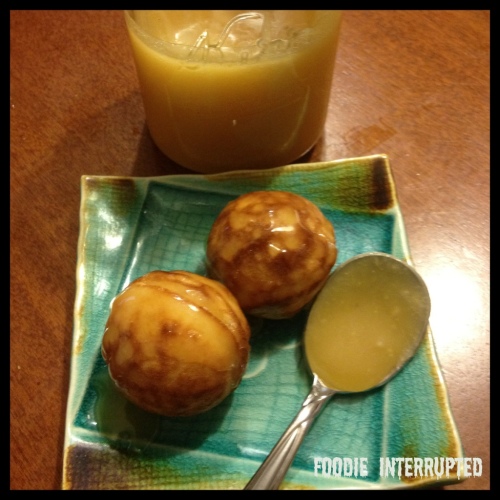
Oh my gosh, do you need to make this. No kidding at all, you really do need to make this. I bought a quart of buttermilk because I needed some to make a ranch dipping sauce (a different post) and now I have to use it all up, hence, this syrup. I adapted it from a bunch of others I have seen in the past. It’s delicious. I don’t have anything really profound to say about it other than that. It would be great for breakfast (waffles, pancakes, or as shown in the picture, on abelskivers) or dessert (on ice cream or pound cake.) If desired, you can eat it by the spoonful. I may or may not be able to speak on this experience.

BUTTERMILK SYRUP

Ingredients:

-1 stick of butter
-1 C Granulated Sugar
-1/2 C Buttermilk
-1 TBS Light Corn Syrup
-1 Tsp Baking Soda
-1 Tsp Vanilla Extract

Directions:

1. In a large pot, melt stick of butter.

2. Add in sugar and corn syrup and stir until dissolved

3. Stir in buttermilk. Stir the mixture continuously until boiling. Continue to stir for a full three minutes while boiling.

4. Add in baking soda, mixture will rise and double. Continue stirring

5. Remove from heat and stir in vanilla until well combined. Let it sit to firm up a bit but be sure to serve warm.

Note: this can last in the refrigerator about a week if covered tightly.

Vacation, All I Ever Wanted and Shrimp Too

20120807-211400.jpg

While it is true that I have not been AWAY on vacation for the entire month of July, I have been on some form of vacation for just about a month. So, slowly getting back to cooking in my own kitchen has been a blessing!

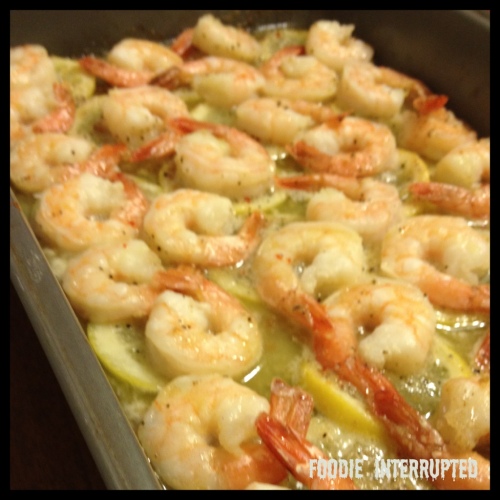
Trying to get caught up with the daily things around here had me scouring for easy recipes this week. I found many versions of this very simple, one-dish shrimp recipe – all were pretty much the same so I ran with it.

Shrimp is a major staple in our home. Foodie Jr. is a shrimp fanatic and I can always count on it being gobbled up. I always keep it on hand for quick, easy and mostly healthy meals.

This recipe has only four ingredients – how much easier can it get? I was pleasantly surprised that for the little effort I put into it, we got a pretty good pay out – all of us liked it. It is almost reminiscent of a scampi with the lemon and butter flavors. I served it with rice and steamed broccoli and it all went really well together. I will most definitely keep this in the quick and easy meal rotation – especially with the school year starting. It’s definitely worth giving a try.

LEMON BUTTER SHRIMP

Ingredients:

-1 lb. of peeled and deveined shrimp (I left the tails on)
-1 stick of Butter
-2 medium sized Lemons, sliced thin
-1 packet of Italian Dressing dry seasoning (whatever brand you like)

Directions:

1. Preheat Oven 350 Degrees.

2. Melt stick of butter in 9×13 baking dish (I did this while the oven pre-heated.)

3. Place lemon sliced on melted butter in a single layer.

4. Place shrimp on lemon slices in a single layer.

5. Sprinkle dressing packet on top of shrimp evenly.

6. Bake for about 15 minutes. (I turned the shrimp once but I don’t think it’s necessary.)

Independence Mango Pineapple Cream Pie

20120704-184746.jpg

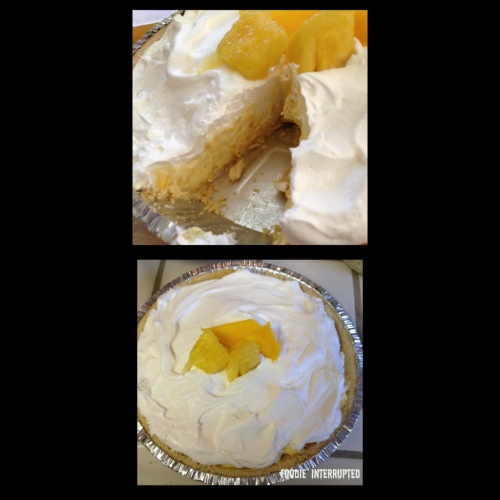
Happy 4th of July, fellow food lovers! This year, our family decided to do a Hawaiian theme for the menu and since my sister in law was bringing Haupia and my mom the Guava cake, I decided to go a different route. Mr. Foodie and I decided on this Mango Pineapple Cream Pie.

I was a little leery about the fresh mango in this because I’ve been less than impressed with all the mangoes I’ve gotten this year. Luckily, I ended up with a decent one and chopped it really fine so it ended up working quite well.

The family really enjoyed this pie, Mr. Foodie was a big fan. It’s a very light, refreshing dessert which was a nice top off to a very heavy meal. It took no time to put together as most of the ingredients are store bought and used as-is. A great thing to bring to a last minute get together or potluck. I would also note that making your own crust and whipped cream would be awesome and I will go that route next time!

Have a very happy and safe Independence Day! I’m off to set off some fireworks!

Mango Pineapple Cream Pie

Ingredients:

-1 Pre-made Shortbread Pie Crust
-1 8 oz. Can of Crushed Pineapple
-1 Mango, seeded, peeled and finely chopped
-1 3 oz. Package of Instant Vanilla Pudding
-8 oz. of Sour Cream
-1 Container of Cool Whip
-Fresh Mango and Pineapple for garnish (optional)

Directions

1. In a medium mixing bowl, mix mango, sour cream, crushed pineapple (do not drain) and dry pudding mix until well combined.

2. Spread mixture into pie crust and chill at least a half hour before serving.

3. Spread top of pie with Cool Whip and garnish with fresh fruit (optional) before serving.

Baked Taquitos With Avocado Sauce

20120702-085854.jpg

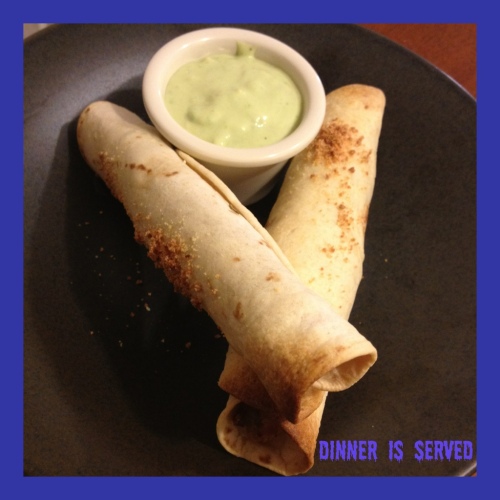
We are all about finger food around here and if any sort of dip is included, it’s a double whammy. This recipe fit that bill, 100%.

These particular taquitos I made using some leftover grilled pork that I had chopped up. I’m sure beef or chicken would work great in these as well if you are not a fan of the pig (gasp!) I baked these in flour tortillas to keep it a little healthier (rather than frying the corn tortillas in oil.)

We really enjoyed this avocado dipping sauce, it was creamy deliciousness. We have had variations of this at restaurants all over and always enjoyed it so I thought it would be a great dip to go with the taquitos. It’s not the sort of dip that can sit around so I would make it when you want to eat it. If you are so inclined, a nice salsa would also make a great dip for these taquitos.

This was very kid-friendly as well. Both my boys ate the taquitos. Foodie Jr. opted to dip his in ranch dressing as he does most other finger foods. Baby Foodie is not much of a dipper so he just ate the taquitos. And, as suspected, the biggest kid of them all, Mr. Foodie had no complaints.

INGREDIENTS

Taquitos:
1 package fajita sized flour tortillas (16)
2 Cups leftover meat (pork, chicken or beef)
~1/4 Cup Mexican Crema
~1/3 Cup Finely grated Cojita Cheese
Olive oil

Dipping Sauce:
1 avocado, pitted and mashed
1/4 Cup Mexican Crema
1/4 Mayonaise (I prefer the one with olive oil)
Splash of milk
2 Tsp white wine vinegar
1/4 Tsp Salt
1/4 Tsp Onion powder
1/4 Tsp Garlic powder
To taste: black pepper and chopped cilantro

DIRECTIONS

For Taquitos:

Pre-heat oven to 400 degrees and spray cookie sheet with cooking spray.

1. I a mixing bowl, add chopped meat, Crema and Cojita cheese and mix well. Add more Crema and cheese if necessary – meat mixture should come together and be sort of ‘sticky’.

2. Place a heaping tablespoon or two on each tortilla and spread into a line for rolling.

3. Roll up each tortilla and place seam
side down on cookie sheet.

4. Brush each taquito with olive oil and bake for 15-20 minutes. Ovens will vary so check and take out when tortillas are browned and crispy.

For Dipping Sauce:

1. Put all ingredients in bowl and mix until they all come together smoothly. There will be a light green tint to the sauce. Play with the spices to suit your family’s taste.

Dole Whip Float

20120628-001039.jpg

As you can tell, it’s been a while since my last blog post. Someone told me that there are three parts to a school year – the beginning, end and the month of May. This is so true. May was so busy with all the commitments I had for Foodie Jr.’s school coming to a head. June has flown by between the school year ending, Foodie Jr. turning seven and summer camps. I am on the go quite a bit so I have decided to try my hand at mobile blogging. Please hang in there while I work out the kinks!

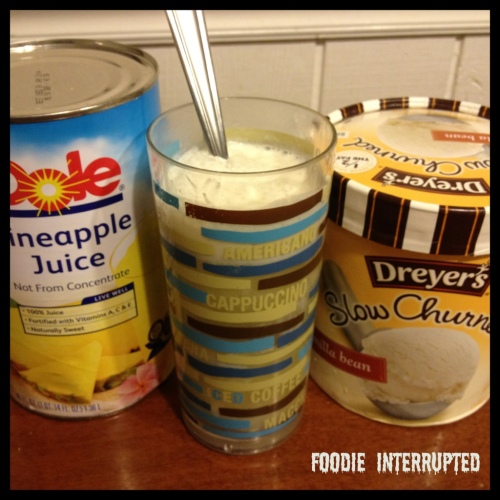
This non-recipe is sort of two-fold. First, Mr. Foodie loves Dole Whips. These are the ice creamy treat you can get in Hawaii at the Dole plantation and at the Tikki room in Disneyland. Second, we die laughing every time we see the Family guy clip when Stewie keeps saying, “hwhip.”. You can see it here: http://www.youtube.com/watch?v=lich59xsjik&feature=youtube_gdata_player

This is more like a Dole hWhip float. So simple and I think Mr. Foodie has had one daily this summer. When the ice cream melts into the pineapple juice, it is delicious. To me, it almost tastes piña-colady. (Coladish? You know what I mean.). Just make one and enjoy.

DOLE WHIP FLOAT

Ingredients
-Favorite Vanilla Ice Cream
-Dole Pineapple Juice

Directions
1. Scoop 2-3 regular sized scoops Imogene vanilla ice cream into a tall glass.
2. Pour pineapple juice over the ice cream.
Note: play with the ratios to your liking.